One of my most popular pages is the one about the Silhouette Cameo replacement blades. If you haven't read it yet, it can be found here. I am long over-due for the promised update! I could pretend that I wanted to wait as long as possible to fully trial the blades, but that just isn't true - life keeps intruding on my blog plans.
So as many of you know I have both a facebook and Etsy shop which means I use my Silhouette Cameo a lot! It isn't just basic shapes I cut with it, but intricate paper cuts and cards like this;
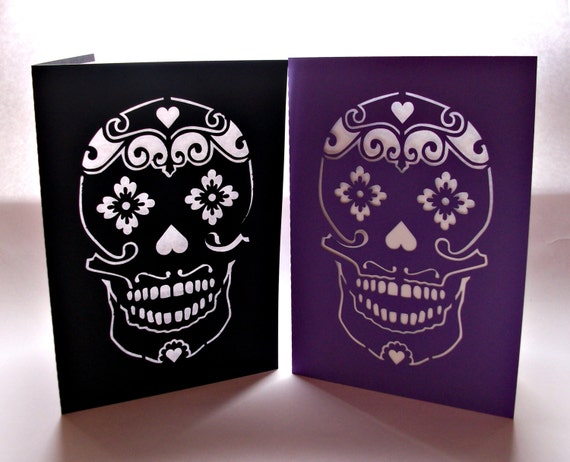
So as many of you know I have both a facebook and Etsy shop which means I use my Silhouette Cameo a lot! It isn't just basic shapes I cut with it, but intricate paper cuts and cards like this;
So any replacement blade that I use has to be both economical, precise and hard wearing.
When I first started using my replacement blades, I encountered the same frustration as figuring out the blade settings when I first got my machine. Because the blade holder I use doesn't have pre-set lengths, you have to wind it by hand and determine if the blade length is suitable by eye! A lot of websites I viewed suggested measuring the original silhouette cameo lengths (1-10) on a piece of paper and imitating them with my replacement holder; that just isn't going to work. Typically the blade has to be more pronounced than the original silhouette blade holder or else it doesn't cut through.
If I am to be completely honest, I didn't think that this would be a viable option in the early days, as when cutting my usual 160gsm card I had to have the blade so pronounced it was leaving score marks when simply moving across the card. With a little trial and error, I soon found that inverting the image (so it cuts out back to front) meant that any score lines would be on the reverse and therefore not visible once assembled.
The only other negative that I can think of is that when higher pressure settings are being used, (anything above 27) the blade holder has a tendency to slide out of the cameo coupling. I have found a way round this though - I simply wrapped a tiny bit of chalk board vinyl around the blade holder and it gripped the coupling with no problems at all.
These were the only negatives I have found with the replacement blades and as they were easily remedied they don't really cause a problem at all. Yes it does take a lot of initial trial and error to find the right blade settings, but after this you are all set to go!
The best thing about this replacement blade and holder is that you can purchase different blade angles for cutting different materials. Also no annoying bits of paper gets stuck in the shaft as there is a pump mechanism that easily clears any paper blockages.
I am so far only on my third blade and have been using it for about 6 months now. As mentioned before, it is used almost daily and I am much happier with how long the blades last compared to the actual silhouette cameo ones.
I cannot recommend this highly enough!
I am using the same blades & LIYU holder. I'm cutting thicker card than you -- up to 210gsm. The results are disappointing and I'm afraid I have wasted £26 on blades & holder. The blade is scoring the card while raised but even then is not cutting through the card. I was using expensive Graphtec blades so quickly I don't think I can afford to run this cutter which is very sad -- I was enjoying the creativity.
ReplyDeleteHi Coyote Mike - I have cut thick card like this with my blade and holder, and it dulled the blade very, very quickly - it's not something I would recommend for long term use (occasionally is fine) as it also strains the machine - a few tips are firstly to invert the image, so that any scoring that occurs will be on the back of the card and so not visible - ie you are cutting back to front. Another tip is once you start cutting, hit the pause button on the machine and then go to settings, there is an option to tell the machine to deep cut, turn it on and then resume cutting. I 'think' it automatically sets it back to normal depth, so you would need to do this every time. I really hope this helps :)
DeleteThank you so much, this is so helpful. I have just bought the cameo and want to use it lots. So knowing the blades can be replaced is a fantastic piece of research. What size would you recommend for felt? Many thanks Dawn
ReplyDeleteHi Dawn, I actually haven't cut felt with my cameo (meant to make xmas decs this way, but haven't gotten round to it yet) but I would guess that the 45 degree blade would be better as it uses most of the blade edge, and is for cutting thicker materials :)
Deletevery good at their jobs, did an excellent customization based on the original model. thank you!
ReplyDelete