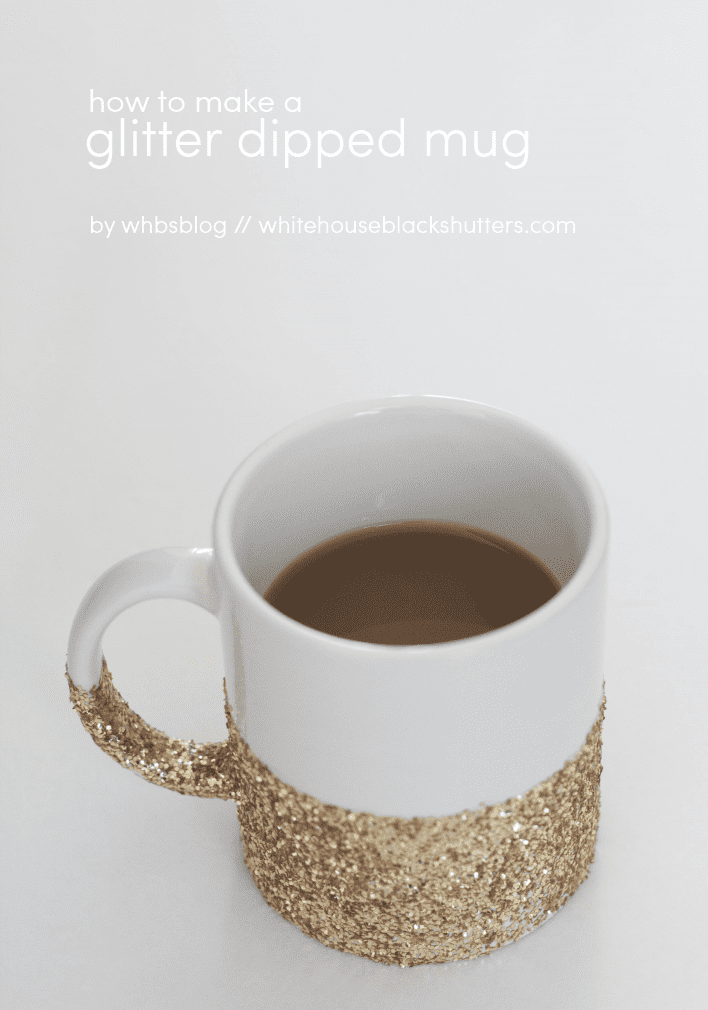
So I made a vow this year to do more crafts that were for me, rather than geared towards selling in the shop. When I cam across this picture on pinterest, my heart literally swooned <3


courtesy of whitehouseblackshutters blog
It is pointless, something only a gal would understand, but I needed one!
The blog mentions that in order to make the glitter mug dishwasher safe, you need to use Martha Stewart Decoupage glue - what followed was an epic weekend long search to find a supplier in the UK
I was frustrated beyond belief, and about to bite the bullet and import it from the US (to hell with the import tax, I NEEDED it!) when I stumbled across a site called emerald crafts and they had one bottle left in stock. It was mine!
So once it arrived, I gathered up all my supplies and set to work!
- Rubbing Alcohol / Surgical Spirit
- Mug
- Masking Tape
- Brush
- Glitter
Rub down your mug with the surgical spirit and make sure it is dry before applying the masking tape.
I initially used a glue dabber to get the decoupage glue onto the mug, but the first coat turned out super streaky :(
After switching to a brush I found the results were much better :D
The decoupage glue is really thick, so it is better to build up thinner layers, than great big thick layers or else it will run! Once the glue is just slightly tacky, carefully remove the masking tape.
Once the glue is completely dry, touch up any areas that need it and once fully dry, apply a final coat of the glue.
Your mug is hand wash ready a week after the final layer has been applied. Once your final coat has been set for 4 weeks, it is then dishwasher safe (top rack only). How awesome is that?!
Now you may have noticed I don't have a final picture of the finished mug, that's because in true butterfly style I got distracted by the thought of upcycling wine glasses.
To see my awesome (cause of distraction) Wizard of Oz glasses, click through to here
Great, but you didnt actually explain the process. Do you add glue, glitter then let dry and repeat and finally add a final layer of glue?
ReplyDeleteThat's it in a nutshell :)
DeleteCan you use this glue or what'd the best glue for sticking rhinestones to glass
DeleteIt is not something that I have done, but I don't see why not :)
DeleteIs there any other glue i can use as a first time glue or incase i cant get the one you have mentioned? X
ReplyDeleteI did a LOT of research and this is the only glue that is dishwasher safe. I know a lot of people use E6000, but it not something I would personally use for anything that would be used with food or drinks, if it were just for decoration, E6000 should be fine.
DeleteA glue called mod podge is good it's from eBay and there is a dishwasher safe one
ReplyDeleteWow, thank you so much for sharing that :)
Deletehttp://www.countryloveceramics.com/articles/what-glue-sealer-varnish-to-use-for-diy-glitter-glasses/
DeleteThank you for sharing :)
DeleteMidge lodge is known as PVA glue in UK.
ReplyDeleteSorry, modge podge is known as PVA glue in UK.😄
ReplyDeleteNot quite Gillian, although PVA is quite similar, Mod Podge has varying types that will make it suitable for outside application, or dishwasher safe, or for decoupage etc :)
Deleteis this safe to use, if I did a wine glass is it safe to drink from ? im trying to find one that's food and drink safe and dishwasher safe.
ReplyDeleteHi there, thank you for your comment :) Since I posted this, the trend for glitter glasses has faded somewhat, but before it did I managed to find a decoupage glue that is foodsafe! In theory you could glitter right up to the rim, BUT if selling you would need to use food safe glitter too in case some was accidentally ingested. The food safe glue is called Aquapro by Decopatch - you need to get the satin or ultra-glossy to be food safe. It is supposed to be hand wash safe, but not sure if it's dishwasher safe. I hope this helps!
Delete