I have a confession, I am a butterfly crafter. I flit from one project to the next, usually before I have actually completed anything. I like shiny new crafts and am often tempted away from current tasks by the siren song of a Pinterest trend.
On a personal level this can be thought of as quirky, on a business level it is downright irksome! Off the top of my head, I currently have at least six crafts in progress. Most are new items for the shops that have either been finished but not photographed for listing, or are just incomplete!
In November last year I decided to do a papercut just for me. It may end up in the store, but it would be designed exactly how I wanted. It was to be inspired by Alice in Wonderland (still one of my favourite films). I spent hours tweaking the concept and then got distracted.
It has sat unfinished for months until I finally decided I selfishly wanted it finished for me, me, me! After all I get so many lovely comments from over-joyed recipients of my work, I wanted a piece of that pie! It has taken hours, the original design was all but gutted. I fired off a rough cut on Saturday (see below) and after a few tweaks the final cut is finally in progress.
I WILL be back with the finished photos, and hopefully it will be in store by the end of today :)
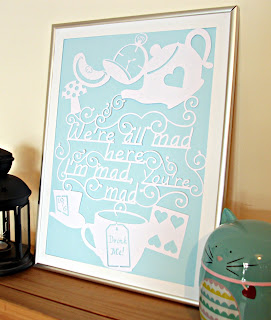
I'm back and delighted to share that I have actually managed to not only complete, but photograph and list my finished papercut on my etsy store :)
I decided upon white and pastel blue as to me this is reminiscent of Alice's dress. I am really pleased with how this has turned out and can't wait to get it hung in my work room :)
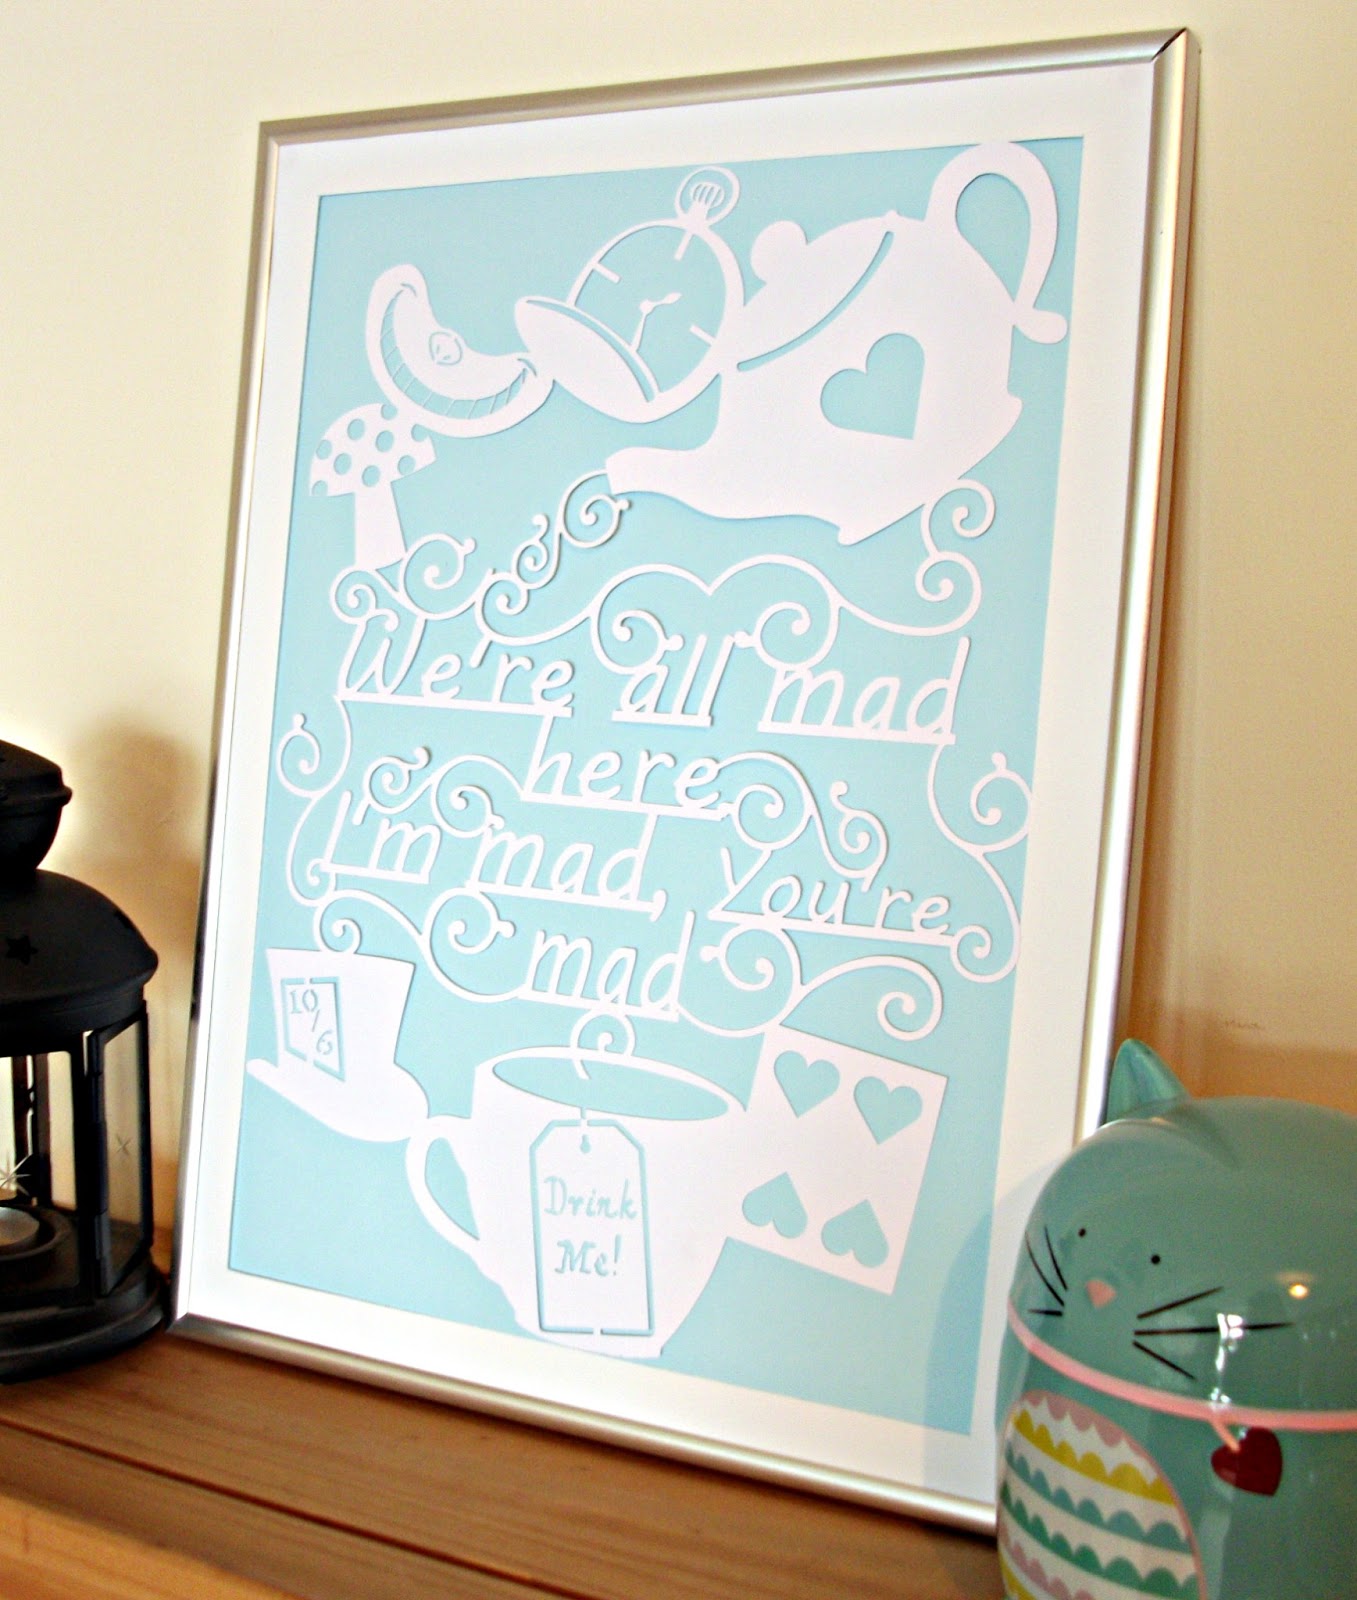


Photographing for the shop is always a nightmare as I have to remove the glass from the frame, this means that the cut is slightly loose in the frame and shadowing is visible. One day I hope to figure out how to get round this issue, but for now I don't think they look too bad!
Comments
Post a Comment