
Bestie's Birthday Gifts

So it was my best friend's birthday last week and obviously I decided to make her a super awesome birthday gift!

I saw a design on the Silhouette store for a 3 drawer gift box and knew that whatever I made her, it had to be packaged in it.  I decided to use heart shaped metal brads for cute little handles, and co-ordinated pastel blue with black.  I am really pleased with how it turned out;


So now that I had the cute wrapping, I need something as equally nice to fill it with.  My friend is a chocolate fiend (bit like me) and so I decided to make her some truffles to put in the drawers.  As there were 3 drawers, I decided on 3 different truffles.


Left to Right - milk chocolate dipped in white chocolate, milk chocolate covered in malibu frosting and mixed nuts, double dipped milk chocolate drizzled with white chocolate

It foolishly didn't occur to me to check the height of the drawers before making the truffles - needless to say they were too big!  Luckily, I had a cute little take away style present box pinned to my DIY gift board (on pinterest) and came up with this


Seeing as this was just a quick printout, it looked quite good - with a little bit of tweaking, it would be perfect!

So now I was short on what to fill my drawers with.  I knew my bestie liked my Tree of Life necklaces, and so I decided to make her one.  Last year I made her a Lapis Lazuli charm bracelet, and so it seemed fitting to make her the Tree of Life version.


When I finished the box, I added tissue paper to each of the drawers which not only held the gifts in place, but gave a nice finish too.

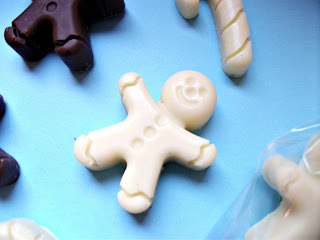
So I had managed to fill one drawer, but i was still two down - I decided to crack out the Christmas chocolate molds.  I actually had lots of fun creating these


I finished my little cellophane bags with curling ribbon - for Christmas I plan to use both Red and Green to make it really festive.

My friend seemed genuinely happy with her gifts and it has made me think that maybe a home made Christmas will not be un-achievable after all :)

Comments

  1. What a great friend you are, the necklace is gorjus!!!.

    New to your blog, off for a nose around :)

    ReplyDelete
  2. This comment has been removed by a blog administrator.

    ReplyDelete

Post a Comment

Popular posts from this blog

Colour B4 Extra Strength Review - Part Two Using the Dye Remover and helping to prevent re-oxidation

If you haven't already read it, you should really check out Part One of this as it details preparation, it can be found here Well it is done and I am rather impressed with the results, even if I do say so myself!  There were a few things that I did differently this time and I will go through the entire process and then share the finished result. You will need; Sectioning Clips Comb Colour B4 Extra Strength Cling Film Two beanie style hats Hair Dryer Shower Bucket Loads of Patience Step One Start by sectioning your hair and clipping the upper portion to the top of your head.  If like me you have long hair, it is best to start with the underneath layers.  I found the easiest way to apply the remover was to take a small section of hair (no more than an inch wide) and squirt a small amount into my gloved hands and start with the ends carefully rub it in.  I usually applied 3 squirts to each section; end, mid length and root.  Time should be taken to ensure each squ

Superdrug Colour Rewind - Hair Dye Remover Review - Part One

I started dying my hair at the grand old age of 15 - fast forward to 12 years later and my hair has become a dried out mop of horror.  I started with black - I loved Marilyn Manson and Slipknot and needed the world to view my hair as an extension of my sheer awesomeness!  This phase lasted until I was about 19; almost 4 years of the darkest of darks layered over my hair. I alternated between black, black-blue, black-purple and even tried dip dyed black and red.  At 19 I wanted a change and decide to bleach it so I could dye it red - after an initial day of ginger (luckily I was favouring the sporty baseball cap in this period) I switched to a dark red.  Next came a few years of alternating between different shades of red and then various browns. When we started trying for a baby in 2010 I was worried that the constant dying of my hair whilst pregnant could cause development issues - I went to a professional hair dresser and had blonde highlights put through my then dark brown

Replacement Blades for the Silhouette Cameo - UK users

From the moment I purchased my Silhouette Cameo I was in love.  The only way I could justify the cost was to start up a business , the only problem with this was the cost of the blades.  I was getting through a blade every few weeks, at just under £16.00 (including postage) for a single blade it was getting very expensive.  I knew that once business picked up I was going to either have to increase prices (never a good idea for new businesses) or take a big knock in profits.  The only solution I could see was be to try and find a cheaper solution to the blades. I was first made aware of using disposable blades by Ligaya's Creativity Zone .  She had had success with an aluminium (CB09) Blade Holder.  This blog was invaluable for advice on the different angled blades available and suppliers of the CB09 Blade Holder. The only drawbacks were the seller was based in Asia (have been stung for import taxes before, and it is a hefty amount) and there were reports that the holder act